
star trek Supplemental Manual
VIP免费
2024-11-30
4
0
486.35KB
8 页
5.9玖币
侵权投诉

Star Trek: Starfleet Command - Supplemental Manual, v1.02
1
Supplemental Manual, v1.02
This document is a supplemental manual for Interplay's Star Trek®: Starfleet Command™. It
contains additional information about the game that was not included in the game manual due to time
constraints or changes made after the manual went to print. This document assumes that you are
using Starfleet Command, version 1.02.
The game version number is found on the race selection screen, in the lower right-hand corner. If
your version number is earlier than 1.02, you can get a patch at:
http://www.interplay.com/sfcommand
or by logging on to the Mplayer service and entering the main SFC lobby.
Reminder: A turn is the amount of time if takes for a phaser to be readied after it is fired. The amount
of real time a turn takes is based on the game speed slider.
Game Speed Slider
The game speed slider goes from 1 to 11 (from slowest to fastest gameplay). The following chart
shows the number of seconds per "turn" for each setting.
1 2 3 4 5 6 7 8 9 10 11
120 90 60 40 30 27 25 20 16 14 12
The game speed slider sets the number of seconds for a "turn". Each weapon and system, however,
uses an individual timer to keep track of when it will be ready to fire, or how long the system will stay
in operation, instead of all weapons and systems using the same game turn like Star Fleet Battles.
Range
Range 1 = 1.00 to 1.99, range 2 = 2.00 to 2.99 and so on. Each range is equal to a "hex" in SFB and
is equal to 10,000km. The scale of the ships and other objects on the screen is artificially inflated so
you can see units at a distance.
Shield Regeneration
Shield regeneration is automatic. You do not have to pay any power or spare parts for this to occur.
An individual shield facing regenerates with the following formula:
1 shield point per turn
+ 1 point if the ship has 4 or more undestroyed labs
+ 1 point if there is a Legendary Science Officer
All shield facings are repaired simultaneously, but the shield strength can never exceed starting levels
plus reinforcement. Any excess shield repair is lost.
In versions of SFC previous to 1.02, there was a more complicated formula that could result in a ship
not being able to regenerate shields during a battle.

Star Trek: Starfleet Command - Supplemental Manual, v1.02
2
Engine Repair
Your engines will slowly repair on their own after they take damage. This automatic repair costs no
energy and takes no spare parts. You can also use one unit of spare parts to repair engine damage
at a faster rate. This ENGINE REPAIR button is located on the Repair Tactical Officer MFD.
Nebulas & Shields
Contrary to the instruction manual, but as per the readme.txt file, shield reinforcement does not work
in a nebula.
Attack Shift
There is a new bit of information displayed on the tactical screen now. It's called the Attack Shift. It
can be found in the lower left-hand corner, near the weapon damage readout. It shows the EW die
roll modifier (the square root of the current difference in the current target's ECM and your ECCM). If
the Attack Shift is more than 0, you need to increase your ECCM.
All weapons, except the Hellbore, roll 1d6 (one six-sided die) to determine hits and/or damage. Each
Attack Shift value is roughly equal to a 16% greater chance of missing or having reduced damage.
The Hellbore, which rolls 2d6 (two six-sided die, total the result) is less affected by the Attack Shift.
The exact odds shift depends on the total, which is on a bell curve, but it will always be lower than the
shift of a single 1d6 roll. That's why the Hellbore is less affected by enemy ECM.
The Attack Shift is often called an "EW Shift", since electronic warfare (ECM and ECCM) is the
primary cause of the shift.
Missile Racks
The different types of missile racks have different statistics. These racks can hold a different base
number of missiles and can fire a different number of missiles per "turn".
Rack Type Base Number of Missiles Firing Rate
A 4 1 per turn
B 6 1 per turn
C 4 2 per turn
F 4 1 every 2 turns
G 4 2 per turn
Total number of missiles in a rack = the base number of missiles * the number of reloads.
Photon Torpedo Tactics
The Photon Torpedo is a more difficult heavy weapon to use than most. It requires patience,
observation and timing to master. When they are not used properly, Photon Torpedoes will often
miss.
Photons should never be fired at a range greater than 8 - ever. The proximity torpedo is useful only
for base assaults and rare tactical situations. As a matter of fact, range 8 is too far. Try range 4 or 2.
As often as possible, overload your Photons. For some ships, this may require that you disable one
bank of Photons, or keep them on standard load -- in order to conserve your precious power. You will
need to use lots of power to control the speed difference between you and your target.
Federation ships are generally tougher than others, and repair their shields faster (thanks to the
additional labs). Take the hit, close the range and fire at weakened shields.
Most importantly of all, Photons are affected by enemy electronic warfare (ECM, or Electronic
CounterMeasures). Make sure that your Attack Shift is 0. This information is displayed on the
tactical screen, in the lower left-hand corner near your target and weapon data. Use enough ECCM
(Electronic Counter-CounterMeasures) to defeat the enemies ECM and keep your Photons on target.
Star Trek: Starfleet Command - Supplemental Manual, v1.02
3
Alpha Strikes
A shift-Z fires an alpha strike. This will fire all readied weapons on all hardpoints at the same time.
This is most useful to "crush" an enemies shield in a single-blow. When firing through a downed
shield, however, it is better to fire one set of weapons, wait 1/20 of a turn (around 2 seconds on the
default speed setting) and fire the next set of weapons. This is called the "Mizia" effect.
Officer Ranks
As mentioned in the instruction manual, there are five different types of officers and five different
types of officer ranks. The various officers in the game have different abilities depending on rank. In
general, a Rookie officer is more likely to fail at tasks while the Legendary officer is more likely to
succeed.
Weapons officer
Rookie: EM penalty +6 (ECM to own weapons while erratic maneuvering).
Junior: EM penalty +5.
Senior: EM penalty +4.
Veteran: EM penalty +3.
Legendary: EM penalty +1. Weapon die roll bonus of -1 (improves all weapon attack die rolls by 1).
Security officer
Rookie: -2 to your hit and run raids, -2 to boarding party actions, +2 to enemy hit and run raids.
Junior: -1 to your hit and run raids, -1 to boarding party actions, +1 to enemy hit and run raids.
Senior: Normal.
Veteran: +1 to your hit and run raids, +1 to boarding party actions, -1 to enemy hit and run raids.
Legendary: +2 to your hit and run raids, +2 to boarding party actions, -2 to enemy hit and run raids.
Science officer
Rookie: 10% tac-intel/deep scan penalty. Sensor penalty of -1.
Junior: Normal.
Senior: Normal.
Veteran: 10% tac-intel/deep scan bonus. Sensor bonus of +1.
Legendary: +1 shield repair rate per turn. 20% tac-intel/deep scan bonus. Sensors bonus of +2.
Engineer officer
Rookie: Repair rate penalty of 50% (takes twice as long to repair as usual).
Junior: Normal.
Senior: Normal.
Veteran: Repair rate bonus of 25%.
Legendary: Repair rate bonus of 50%.
Helm officer
Rookie: HET penalty of 16%. HET energy cost is x1.2 normal. HET time is x1.25 normal. EM energy cost
is x1.1 normal.
Junior: HET time is x1.1 normal.
Senior: HET energy cost is x.9 normal.
Veteran: HET energy cost is x.8 normal. HET time is x.75 normal. EM energy cost is x.8 normal.
Legendary: HET bonus of 16%. HET energy cost is x.7 normal. HET time is x.5 normal. EM energy cost
is x.5 normal.
Boarding Parties
To capture a ship, you must put more of your marines on the target ship than there are defending
marines. Once you exceed the defending marines, the capture is almost assured -- but it can still
take an amount of time. You can send a single marine, which may be needed to turn the tide of
battle, by opening the Security Officer Tactical MFD, selecting CAPTURE and then double-clicking on
one of your Marine icons. You cannot capture ships in multiplayer.
Hit and Run Missions
Your marines can also perform hit and run raids. The instruction manual gives details on how to set
raids. You can probe a target at a distance, to have more time to plan your hit and run raids. If you
switch targets, the hit and run raid plans are disrupted. Also, your security officer will automatically
lower your facing shield and engage the transporters as soon as the range to the target is within 5,
and the target has a downed facing shield.

Star Trek: Starfleet Command - Supplemental Manual, v1.02
4
Security Guards
Your security officer automatically sets guards for your various systems and weapons against enemy
hit and run attacks. The higher your security officer rank, the less likely those H&R raids are to affect
you. It is not possible for a player to designate systems to guard.
Player Ranks & Prestige Costs
The amount of prestige you earn, regardless of prestige used to purchase ships, officers and items, is
called Lifetime Prestige. This type of prestige is used to advance in rank. The primary effect of
advancing in rank is that ships cost less. Note that as you purchase ships, officers and items, your
lifetime prestige is not reduced.
The amount of lifetime prestige also determines when the elite forces for that race will invite the
player to join their services. A player can only belong to a single elite force, in case there are multiple
organizations for that race. Joining an elite starts a special series of campaign missions. The
campaign game will not end until these missions are completed.
Federation
Lt. Commander 0
Commander 400
Captain 1,000
Commodore 2,000
Rear Admiral 3,000
Elite: Starfleet Special Task Force 600
Klingon
Lt. Commander 0
Commander 400
Captain 1,000
Commodore 2,000
Rear Admiral 3,000
Elite: Klingon Black Staff 600
Romulan
Ante-Tribune 0
Tribune 400
Sub-Commander 1,000
Commander 2,000
Sub-Admiral 3,000
Elite: The Tal Prai'ex 500
Elite: The Tal Shi'ar 800
Gorn
Jr. Commander 0
Sr. Commander 400
Jr. Captain 1,000
Sr. Captain 2,000
Commodore 3,000
Elite: The King's Fleet Guard 900
Elite: The Defenders of the Egg 700
Elite: The Guardians Errant 500
Lyran
Lt. Commander 0
Commander 400
Captain 1,000
Commodore 2,000
Sr. Commodore 3,000
Elite: The Red Claw Clan 500
Elite: The Iron Fang Clan 800
Hydran
Sub Commander 0
Commander 500
Captain 1,000
Commodore 2,000
Third Admiral 3,000
Elite: The Keepership 800
Transporting Special Items
In addition to transporting marines and spare parts, your transporters can also be used to transport
special items. The exact item will depend on the scenario.
Special transporter items appear in the transporter menu. They can be transported to or from your
target. Items on the left on your ship and can only be transported TO a target, while items on the
right are on your target and can only be transported FROM the target to your ship. Click the
transporter item icon and click TRANSPORT. Your ship must be within transporter range (5) of the
target, and shields cannot be raised. If your target is allied, that unit will drop the facing shield to
complete the transport when in range.
Star Trek: Starfleet Command - Supplemental Manual, v1.02
5
Cloaking Device
The Cloaking Device has undergone some substantial improvements since the release of the game.
It now breaks lock-ons of enemy ships, which are required to launch seeking weapons. It will also
affect seeking weapons in flight before the ship started to cloak, as the weapons will track for a
random length of time before losing their own lock-on and self-destructing.
The effect of the cloaking device is not to make the ship impervious to detection. Enemy ships can
get a "rough" idea of the cloaked ship's location, based on disturbances and sensor realignments.
What the cloaking device does is to affect the targeting computers, making fine targeting impossible
and forcing the enemy ship to blanket the area the cloaked ship may be located in -- thus reducing
the chance the cloaked ship will be hurt and reducing damage from weapons fire. It is, in one sense,
a super improved version of ECM. Also be sure to keep in mind the scale of the game. The tactical
screen is a computer representation of the ships and terrain, where the ships are artificially increased
in size in relationship to the terrain. If scaled properly, ships would be a single pixel on the screen or
you would never see your opponents.
A ship firing at a completely cloaked ship without a lock-on has the effective range of its weapons
doubled and an additional range 5 penalty added on. If the weapon does hit, there is an equal
chance that the weapon damage will do normal damage, 1/2 damage or 1/4 damage.
Fighters/Shuttles
There are three different types of Hydran fighters.
Stinger-1 (Patrol)
This is the earliest available fighter. Each fighter is armed with 2 fusion cannons and
2 phaser-3s. All weapons can be fired in the FA (forward arc) only.
Stinger-2 (Intercept & Assault)
This is an improved version of the ST-1 and is the standard fighter for the medium
era. It is also armed with with 2 fusion cannons but it carries a phaser-G instead of
one of the ph-3s. The fusions and the ph-G are FA weapons, while the ph-3 is an
improved 360°.
Stinger-H (Heavy & Assault)
A hellbore-armed variant of the ST-2 fighter. The ST-H is the standard fighter of the
late era. This is a heavier fighter designed to attack ships from a distance. It is
armed with a hellbore cannon (FA), 1 phaser-G (FA) and 1 phaser-3 (360°).
Fighters have a speed of 20+ and can take around 8-12 points of damage. Fighters are organized
into squadrons of one to six fighters. Each squadron of fighters is treated as one unit for targeting,
damage, and orders.
Fighters do not have to be re-armed. However, returning a flight of fighters to the shuttle bay will
repair any damage to the flight. Repairing a flight will not replace destroyed fighters.
All general admin shuttles are armed with 2 360° phaser-3s.
Waypoint Markers
When you left-click to set a new course, that new heading will override any previous course heading.
You can shift-click, however, to set a series of consecutive course changes. These are known as
waypoint markers. They look like diamonds in space. Once you start setting waypoints, your ship will
attempt to pass through as many of the waypoints, in order, as possible. As soon as you enter a non-
waypoint course change (ie, you just left-click), all waypoints will be discarded.
If you set a series of waypoints for a ship, and then jump command to another ship, the AI that takes
over your previous ship will discard the waypoints.

摘要:
展开>>
收起<<
StarTrek:StarfleetCommand-SupplementalManual,v1.021SupplementalManual,v1.02ThisdocumentisasupplementalmanualforInterplay'sStarTrek®:StarfleetCommand™.Itcontainsadditionalinformationaboutthegamethatwasnotincludedinthegamemanualduetotimeconstraintsorchangesmadeafterthemanualwenttoprint.Thisdocumentass...
声明:本站为文档C2C交易模式,即用户上传的文档直接被用户下载,本站只是中间服务平台,本站所有文档下载所得的收益归上传人(含作者)所有。玖贝云文库仅提供信息存储空间,仅对用户上传内容的表现方式做保护处理,对上载内容本身不做任何修改或编辑。若文档所含内容侵犯了您的版权或隐私,请立即通知玖贝云文库,我们立即给予删除!
相关推荐
-
Michael Moorcock - Elric 6 - StormbringerVIP免费
 2024-12-08 19
 -
Michael Crichton - PreyVIP免费
 2024-12-08 22
 -
Mercedes Lackey - WintermoonVIP免费
 2024-12-08 19
 -
Mercedes Lackey - SE 1- Born To RunVIP免费
 2024-12-08 18
 -
Mercedes Lackey - Heralds of Valdemar 1 - Arrows Of The QueeVIP免费
 2024-12-08 24
 -
Melville, Herman - TypeeVIP免费
 2024-12-08 31
 -
MaryJanice Davidson - [Betsy 5] - Undead and Unpopular (v1.0)VIP免费
 2024-12-08 34
 -
Marion Zimmer Bradley - Darkover - The Heirs of HammerfellVIP免费
 2024-12-08 38
 -
MacDonnell, J E - 096 - Execute!VIP免费
 2024-12-08 23
 -
Lovecraft, H P - The Dream Quest Of Unknown KadadthVIP免费
 2024-12-08 41
分类:外语学习
价格:5.9玖币
属性:8 页
大小:486.35KB
格式:PDF
时间:2024-11-30
作者详情
相关内容
-
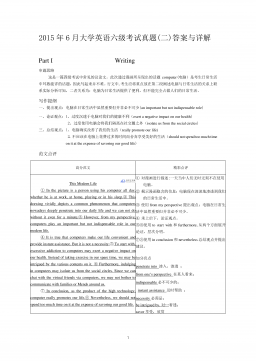
2015年6月英语四级真题答案及解析(卷二)
分类:外语学习
时间:2025-05-02
标签:无
格式:PDF
价格:5.8 玖币
-
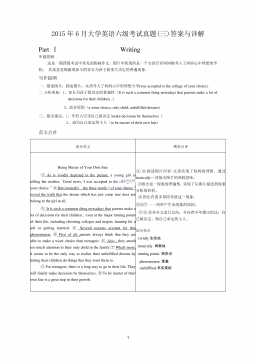
2015年6月英语四级真题答案及解析(卷三)
分类:外语学习
时间:2025-05-02
标签:无
格式:PDF
价格:5.8 玖币
-
2016年12月六级(第二套)真题
分类:外语学习
时间:2025-05-02
标签:无
格式:PDF
价格:5.8 玖币
-
2016年12月六级(第三套)真题
分类:外语学习
时间:2025-05-02
标签:无
格式:PDF
价格:5.8 玖币
-

2016年12月六级(第一套)真题
分类:外语学习
时间:2025-05-02
标签:无
格式:PDF
价格:5.8 玖币

